Choosing the perfect website template is a critical first step in creating a professional and visually appealing online presence. With Wix, the process is not only easy but also offers endless opportunities for customization. Whether you're building a business website, a personal blog, or an online store, Wix provides over 800 professionally designed templates tailored to a wide range of industries.
In this guide, we’ll walk you through how to select the right template for your website and customize it to reflect your unique style and purpose.
1. Why Selecting the Right Template Matters

A well-chosen template does more than just look good; it helps communicate your brand’s identity, improves user experience, and sets the tone for your entire website.
Key Benefits of Choosing the Right Template:
-
Saves Time: Starting with a template that closely matches your needs minimizes editing time.
-
Improves Engagement: A visually appealing and functional template keeps visitors on your site longer.
-
Builds Credibility: A professional design reflects well on your business or personal brand.
2. How to Choose the Perfect Wix Template
Step 1: Define Your Website’s Purpose
Before diving into the template library, identify the goal of your website.
-
Are you creating an e-commerce store?
-
Is your focus on blogging or sharing content?
-
Do you need a portfolio to showcase your work?
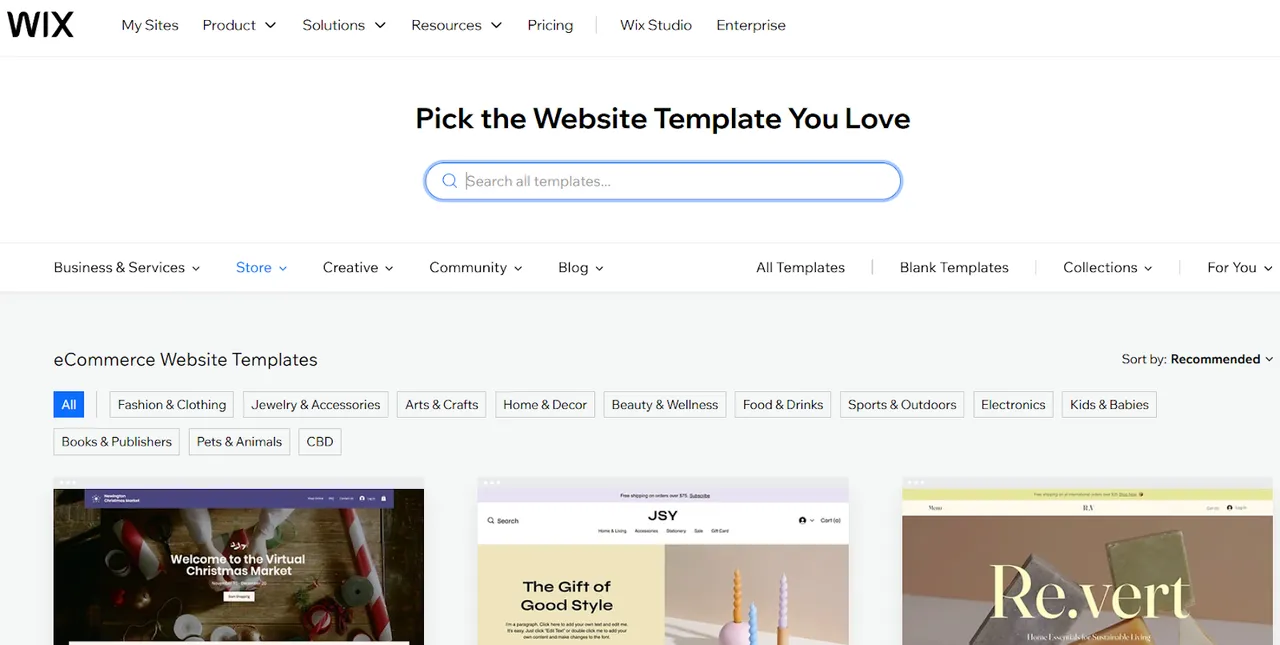
Wix categorizes templates by purpose, such as business, creative, online store, or personal use, making it easier to find the right fit.
Pro Tip: Make a list of essential features your website will need, like contact forms, image galleries, or booking systems.
Step 2: Browse the Template Library
Navigate to the Wix Template Library and explore templates by category or search for keywords relevant to your niche.

Popular Template Categories:
-
Business & Services: Perfect for startups, freelancers, and agencies.
-
Online Stores: Designed for e-commerce with product pages and secure checkout options.
-
Photography: Highlight visuals with full-width galleries and sleek layouts.
-
Blogs: Showcase articles and engage readers with clean, minimalist designs.
Pro Tip: Use the preview feature to see how a template functions in real-time before committing to it.
Step 3: Consider Responsiveness and Compatibility
Ensure the template is mobile-friendly and adapts well to different screen sizes. With more users browsing on mobile, a responsive design is essential.
What to Look For:
-
Smooth navigation on both desktop and mobile.
-
Easily readable text and clickable buttons.
-
Fast loading times to prevent visitor drop-off.
3. Customizing Your Wix Template
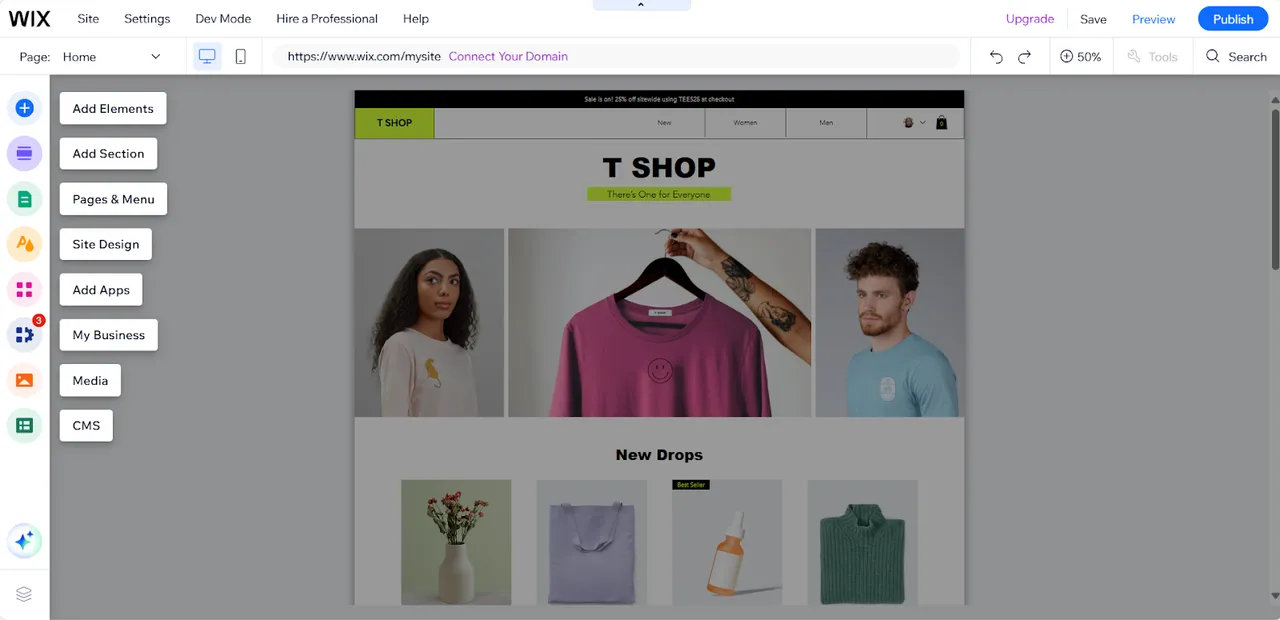
Once you’ve selected a template, it’s time to make it uniquely yours. Wix’s drag-and-drop editor makes customization simple and intuitive.
Step 1: Personalize the Content
Replace placeholder text and images with your own content.
How to Customize Content:
-
Edit text boxes to include your brand name, services, or blog posts.
-
Upload high-quality images that align with your brand.
-
Use Wix’s free media library for professional stock photos and videos.
Pro Tip: Keep your content concise and engaging to improve readability.

Step 2: Adjust the Layout and Design
Tailor the template’s design elements to match your vision.
Customization Options:
-
Fonts and Colors: Choose typography and a color scheme that reflect your brand identity.
-
Page Layouts: Rearrange sections, add new pages, or remove unnecessary elements.
-
Backgrounds: Use solid colors, gradients, or videos to create a visually appealing backdrop.
Pro Tip: Maintain consistency across all pages to create a cohesive experience for visitors.
Step 3: Add Features and Apps
Enhance your website’s functionality by integrating apps and advanced tools.
Essential Add-Ons:
-
Contact Forms: Allow visitors to get in touch with you easily.
-
Social Media Links: Connect your site to your social platforms.
-
Booking Systems: Ideal for businesses offering services or appointments.
-
E-commerce Features: Include shopping carts, product galleries, and payment gateways.
Pro Tip: Explore the Wix App Market to find apps that align with your website’s goals.
Step 4: Optimize for Mobile

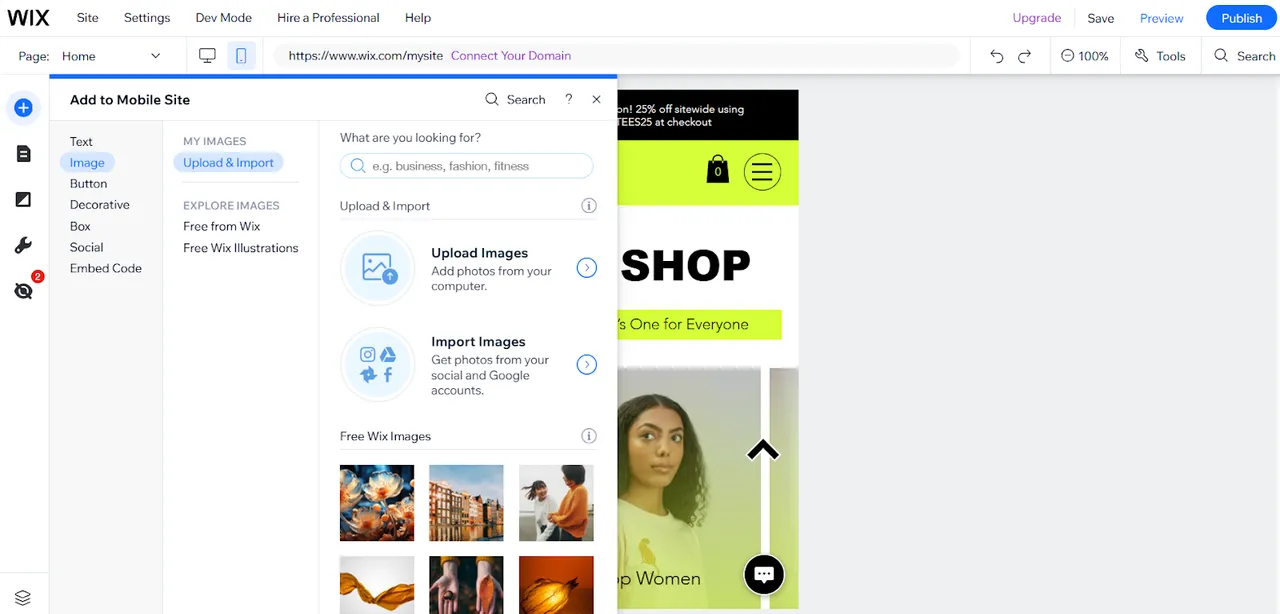
Switch to Mobile View in the Wix Editor to ensure your design looks great on smaller screens.
Key Adjustments for Mobile:
-
Simplify navigation menus for easier browsing.
-
Ensure buttons and forms are touch-friendly.
-
Optimize images and text for faster loading times.
Pro Tip: Use Wix’s mobile optimization tools to automatically adjust layouts for the best user experience.
4. Testing and Publishing Your Customized Website
Before publishing, take time to review and test your website.
Steps to Test:
-
Use the Preview feature to see your site in action on desktop and mobile.
-
Test all links, buttons, and forms to ensure they work correctly.
-
Check for spelling errors, formatting inconsistencies, and broken links.
Once satisfied, click “Publish” to make your website live.
Pro Tip: Connect a custom domain to enhance your website’s professionalism and SEO performance.
5. Tips for Selecting and Customizing the Right Template
-
Start Simple: Choose a clean and easy-to-navigate template. You can always add more complexity later.
-
Focus on Your Audience: Design your website with your target visitors in mind, ensuring it meets their needs and expectations.
-
Regularly Update Content: Keep your site fresh with updated images, blog posts, and announcements.
Conclusion
Selecting and customizing the right Wix template is the foundation of a successful website. With Wix’s wide range of templates and powerful editing tools, creating a personalized, professional, and functional site is easier than ever. By following this guide, you’ll be well on your way to building a website that truly represents your vision and goals.
Ready to get started? Visit Wix today and find your perfect template!


